KB-06: Inspecting Your Pond Shield Coating
Once Pond Shield has cured, the final step before filling your pond, water feature, aquarium, or other project is a thorough inspection.
Even when an application looks complete from a distance, small thin spots, pinholes, missed areas, or other imperfections can be difficult to see until you inspect the coating closely. Taking a few extra minutes now can help identify areas that should be touched up before the project is placed into service.
The goal is simple: verify that the entire coated surface has complete, consistent coverage before adding water.
Inspect Every Square Foot
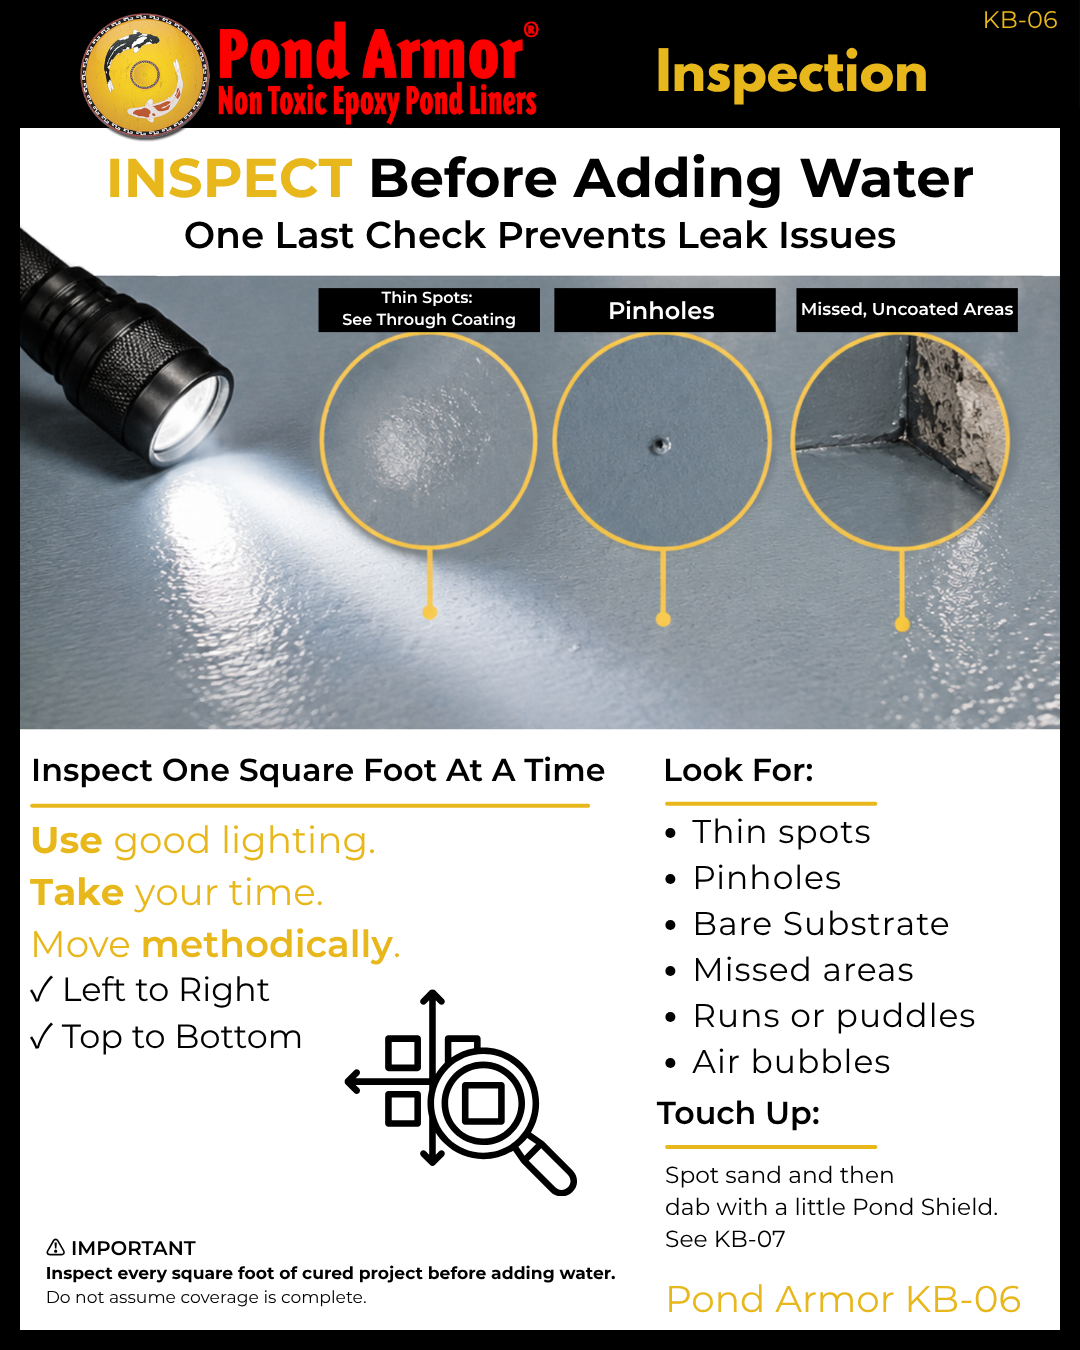
Do not rely on a quick visual check from across the project. Instead, divide the coated surface into manageable sections and inspect approximately one square foot at a time.
Work systematically so you know every area has been checked. A simple inspection pattern works well:
- Move from left to right
- Continue from top to bottom
- Use good lighting
- Take your time
On larger ponds or complex water features, this method can help prevent areas from being accidentally skipped.
What to Look For
As you inspect the cured Pond Shield surface, look closely for anything that interrupts the uniform coating. Pay particular attention to the following:
Thin Spots
Look for areas where the coating appears noticeably thinner or where the underlying surface may be visible through the coating. These areas may not have received complete coverage during application.
Pinholes
Pinholes are very small openings in the coating that can be easy to overlook without close inspection. Examine the surface carefully and from multiple angles when possible.
Bare Substrate
Look for any location where the original concrete, block, fiberglass, metal, wood, or other prepared surface remains exposed.
Missed Areas
Corners, edges, transitions, penetrations, and irregular surfaces deserve extra attention because they can be easier to miss during application.
Runs or Puddles
Check for areas where excess material may have accumulated or flowed during application.
Air Bubbles
Inspect the finished surface for bubbles or other small imperfections that may have formed while the coating was being applied or cured.
Use Good Lighting
Lighting can make a major difference when inspecting a coated surface. Whenever possible, inspect the project under bright, even lighting and view the surface from multiple angles.
Changing your viewing angle can make thin spots, pinholes, texture changes, or other imperfections easier to identify. Do not rush this part of the process. A project that appears uniform at first glance may reveal small areas that need attention when examined closely.
If You Find an Area That Needs Attention
Finding a small imperfection during inspection does not necessarily mean there is a problem with the entire application.
For localized areas requiring additional coating, spot sand the affected area and apply a small amount of Pond Shield. The next Knowledge Base article, KB-07 – Touch-Up & Repair, covers the touch-up process in greater detail.
If the issue involves damage or failure of the underlying substrate rather than simply an incomplete coating area, address the underlying surface problem before recoating.
One Last Check Before Adding Water
Once the inspection is complete and any necessary touch-ups have been properly completed and cured, perform one final visual check.
The entire surface should have continuous coverage with no obvious bare areas, thin spots, pinholes, or missed sections.
This final inspection is a small step compared with the overall project, but it is an important part of completing a Pond Shield application correctly.
Inspect carefully now—before the project is filled and placed into service.
Continue Through the Pond Shield Knowledge Base
Proper inspection is part of the complete Pond Shield application process. Continue through the Knowledge Base for guidance on correcting any areas that need attention.