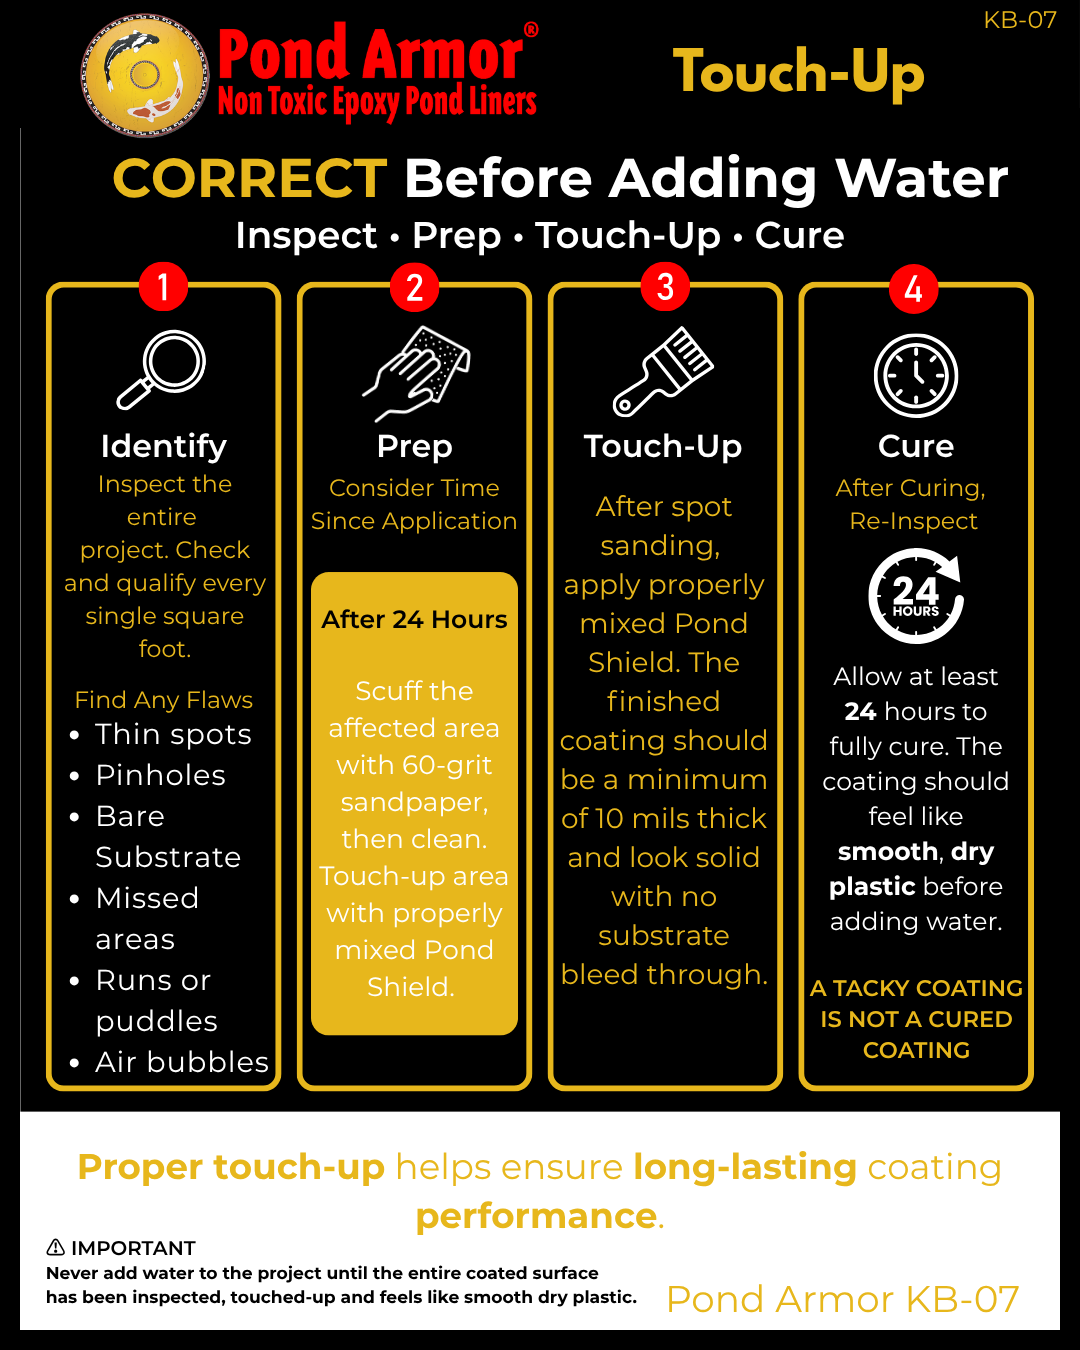
KB-07: Pond Shield Touch-Up & Repair
If your final inspection reveals a thin spot, pinhole, missed area, or another small imperfection, a localized Pond Shield touch-up repair can be used to restore complete coating coverage before adding water.
Touch-up work should be approached with the same attention to surface preparation, mixing, application, and curing as the original Pond Shield application. The goal is not simply to cover the visible spot, but to properly prepare the area so the additional Pond Shield can bond to the existing surface.
Before beginning, first determine whether you are dealing with a simple coating touch-up or a problem with the underlying substrate.
When Is a Pond Shield Touch-Up Appropriate?
A localized touch-up may be appropriate when your inspection identifies a small area that needs additional coating, such as:
- A thin spot
- A small pinhole
- A missed or uncoated area
- A small area where complete coverage was not achieved
- A localized coating imperfection discovered during final inspection
If you have not yet completed a full inspection of the project, review KB-06 – Pond Shield Inspection before beginning touch-up work.
Step 1: Identify the Area That Needs Attention
Start by identifying the complete area that requires touch-up. Use good lighting and inspect beyond the immediately visible imperfection to make sure you understand the extent of the area that needs additional coating.
For small thin spots, pinholes, or missed areas, the repair may be very localized. If the affected area is larger than expected, inspect the surrounding coating and substrate before proceeding.
Step 2: Spot Sand the Area
Before applying additional Pond Shield, spot sand the area that will receive the touch-up coating.
The purpose of sanding is to prepare the existing surface for the additional coating. Make sure the area being recoated is adequately prepared rather than simply applying fresh Pond Shield over an untouched cured surface.
For additional information about proper surface preparation, see KB-02 – Surface Preparation.
Step 3: Clean the Prepared Area
After sanding, remove sanding dust, loose material, and other contaminants from the repair area.
The surface should be properly prepared, clean, and ready to receive the touch-up coating. Avoid introducing dirt, moisture, dust, or other contaminants before applying Pond Shield.
Step 4: Mix Only What You Need
For a small Pond Shield touch-up repair, only a small amount of material may be required. Mix only the amount you can reasonably apply within the available working time.
Maintain the correct 2 parts Part A to 1 part Part B ratio by volume, even when preparing a small batch.
Mix the material thoroughly and scrape the sides and bottom of the mixing container to help ensure the components are completely combined.
For complete mixing guidance, review KB-03 – Mixing Procedures and KB-03A – Mixing Safety.
Step 5: Apply the Touch-Up
Apply the freshly mixed Pond Shield to the properly prepared area, making sure the imperfection receives complete coverage.
Work the coating evenly across the touch-up area and avoid leaving another thin spot or missed section. The objective is to restore continuous Pond Shield coverage across the repaired area.
For additional application guidance, review KB-04 – How to Apply Pond Shield.
Step 6: Allow the Touch-Up to Cure
After completing the repair, allow the Pond Shield touch-up to cure before placing the project into service.
Do not add water simply because the surrounding original coating has already cured. The newly applied Pond Shield must also complete its required cure period.
Allow a minimum of 24 hours for full cure. Properly cured Pond Shield should feel like smooth, dry plastic rather than remaining soft or tacky.
Step 7: Reinspect the Repair
Once the touch-up has cured, inspect the repaired area again using good lighting.
Confirm that the original thin spot, pinhole, missed area, or other coating imperfection has been completely covered. Also inspect the edges of the touch-up and the surrounding coating.
If everything has complete coverage and the newly applied Pond Shield has fully cured, the repair is complete.
Coating Problem or Substrate Problem?
It is important to distinguish between an imperfection in the Pond Shield coating and a problem originating beneath it.
A missed spot or localized area of insufficient coverage may require only a Pond Shield touch-up. A crack, damaged substrate, loose material, movement, or another underlying surface problem should be corrected before additional coating is applied.
Simply applying more Pond Shield over an unresolved substrate problem does not correct the cause of the problem.
When in doubt, inspect the underlying surface carefully and return to the appropriate surface-preparation procedure before recoating.
Complete the Project With One Final Inspection
After all touch-ups have been completed and cured, perform one final inspection of the entire project before adding water.
Check again for thin spots, pinholes, bare substrate, missed areas, or other imperfections. A methodical final inspection helps ensure that every section of the project has received complete Pond Shield coverage.
For the full inspection procedure, return to KB-06 – Pond Shield Inspection.
Once all necessary touch-ups are complete, fully cured, and reinspected, your Pond Shield application is ready for the next step.
Continue Through the Pond Shield Knowledge Base
KB-07 completes the inspection and touch-up portion of the Pond Shield application process. Continue using the Pond Shield Knowledge Base as a reference for preparation, mixing, application, coating thickness, inspection, and future project questions.